You have no items in your shopping basket.
Swipe to the left
Easy Free Amigurumi Toy Pattern
Print
By Amy
4 years ago
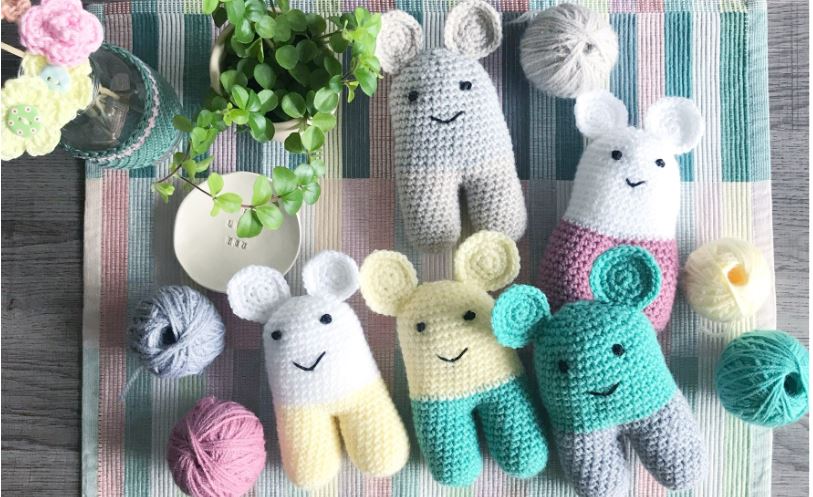
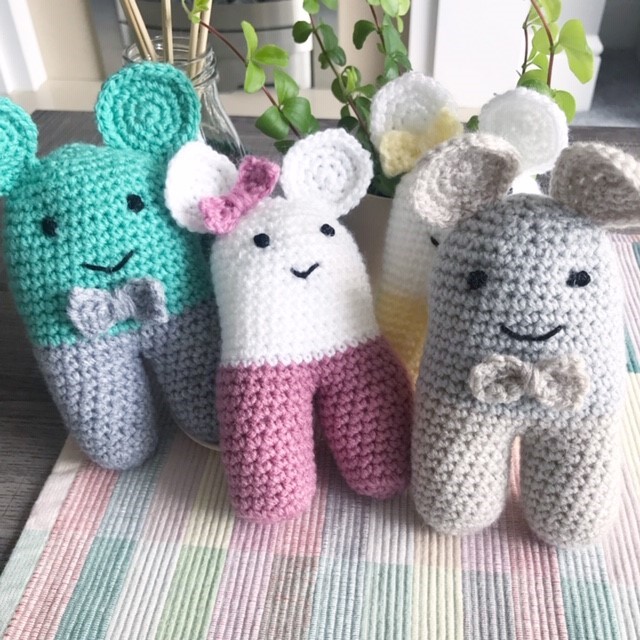
Introducing Hugo and Hermione by Sue Rawlinson! This cute pair would make the perfect first amigurumi project, with the pattern being so simple and forgiving – if they don't come out quite as they should do, then the more personality they'll have and the more unique they'll be!
Hugo in his smart bow tie and Hermione with her dainty bow, in their different colourful outfits, are knitted here in Go-To DK. The yarn is 100% acrylic and easy to wash in the washing machine, so perfectly soft for little hands as well as being able to stand up to lots of playing! You can buy the yarn here in a lovely range of shades.
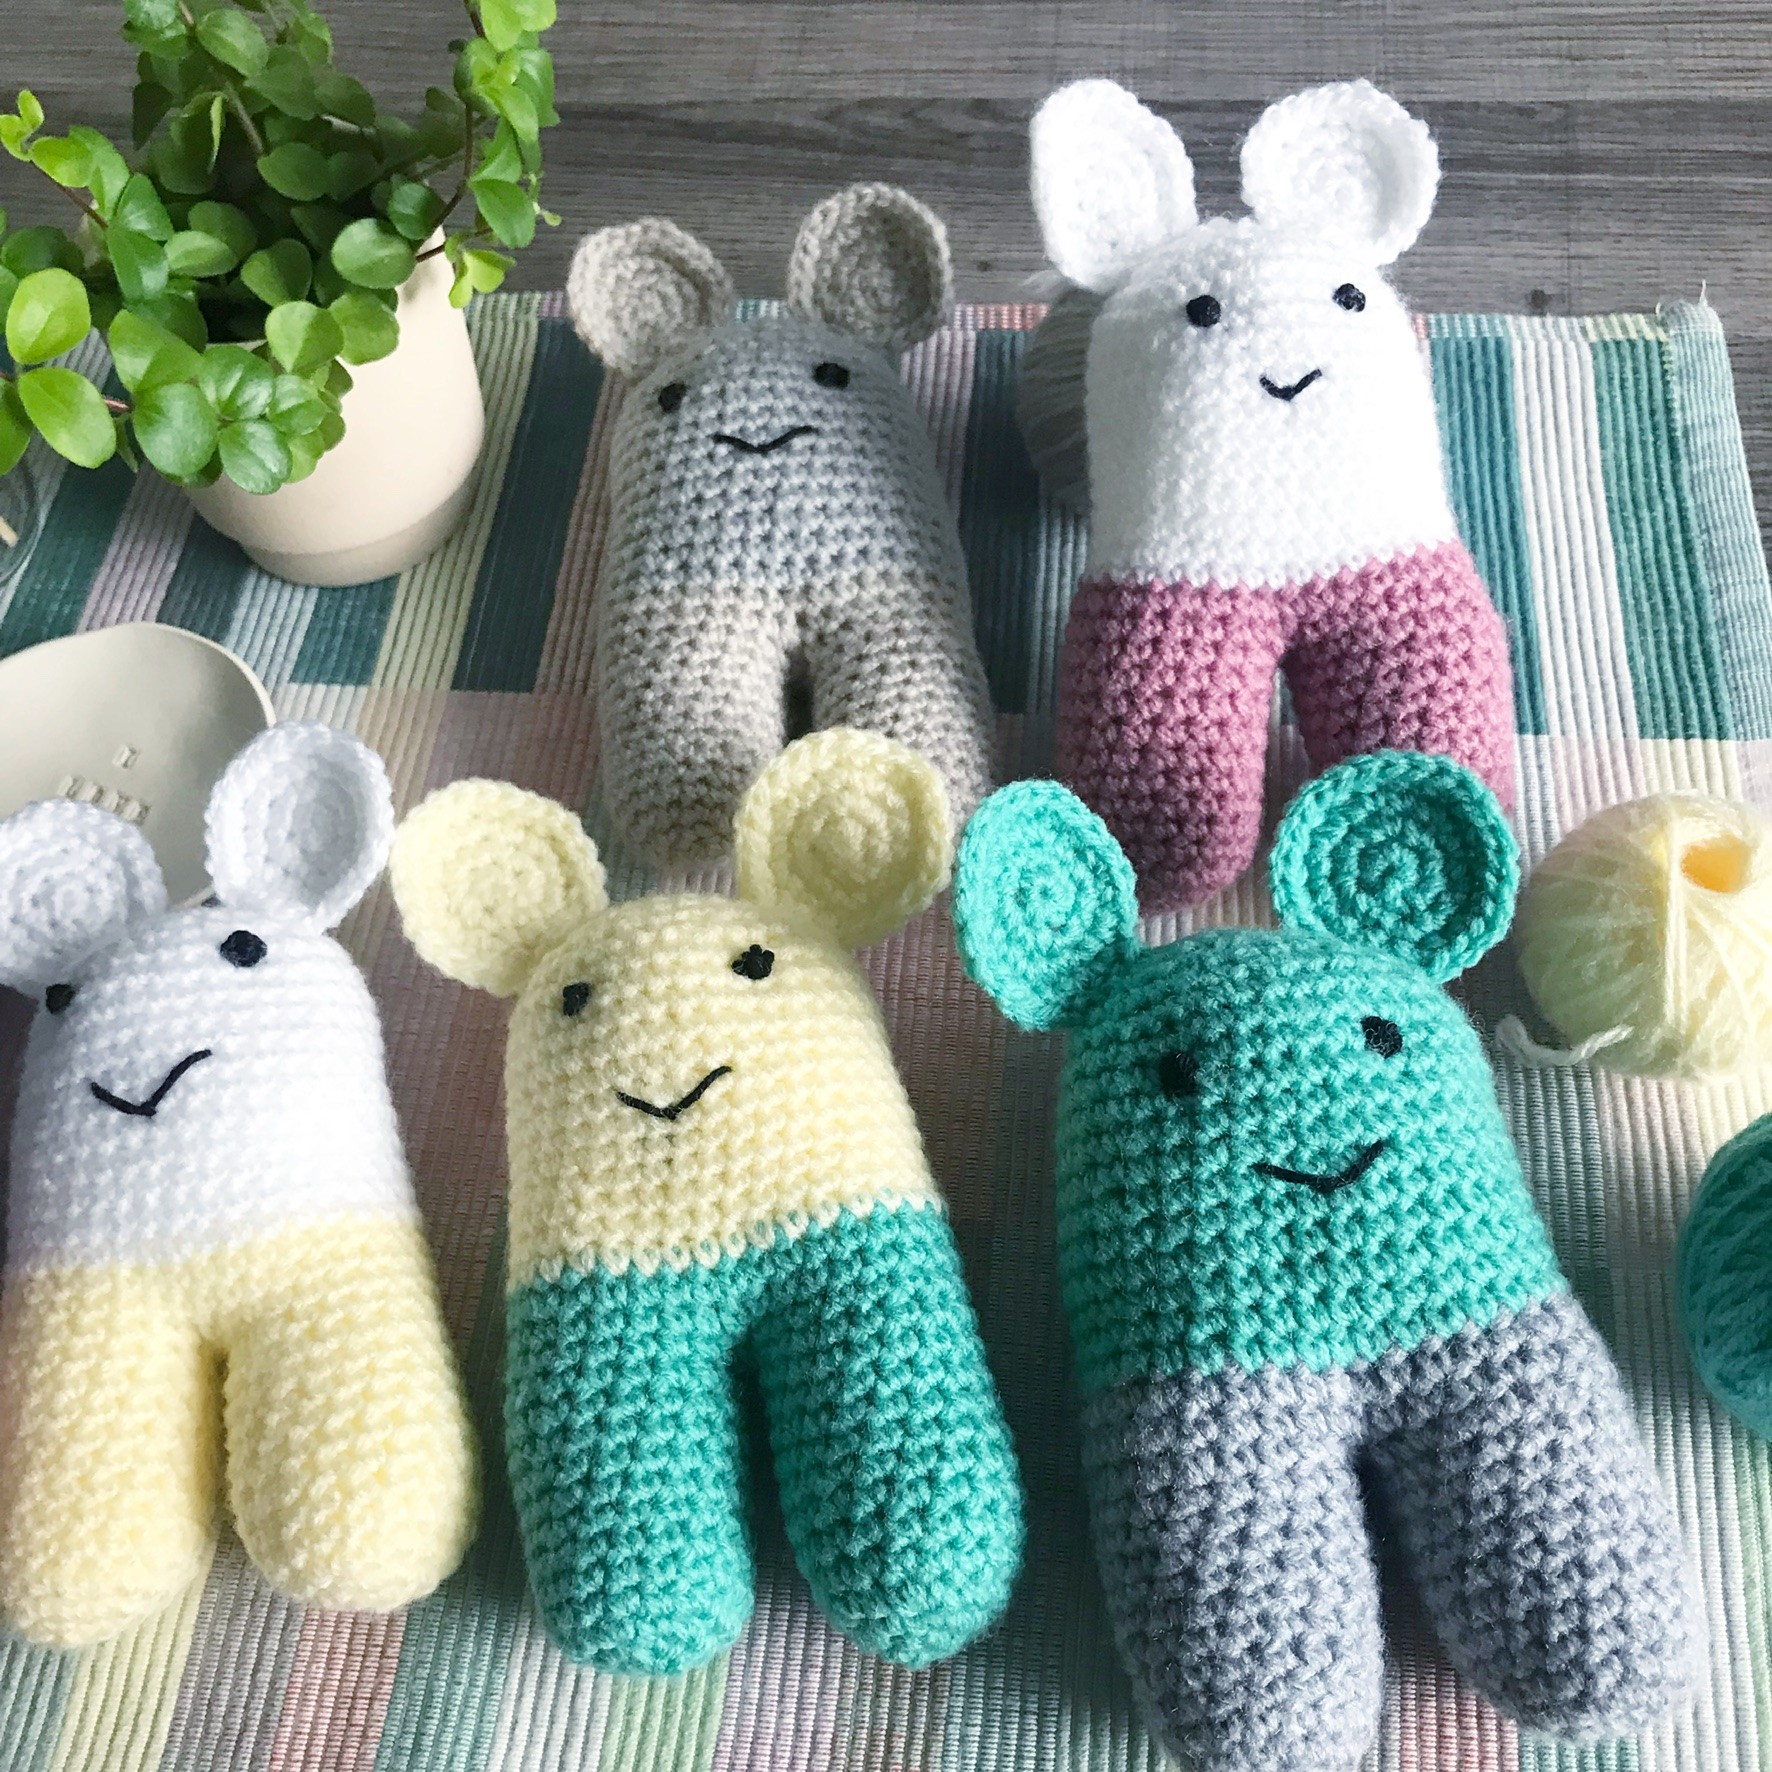
The shades Sue has chosen for these sweet toys are White, Grey, Almond, Dusky Pink, Pale Lemon, Silver and Ocean. If you love the colour combination of these pretty shades as much as we do, Sue has also designed the beautiful Boho Blanket in the same colour palette.
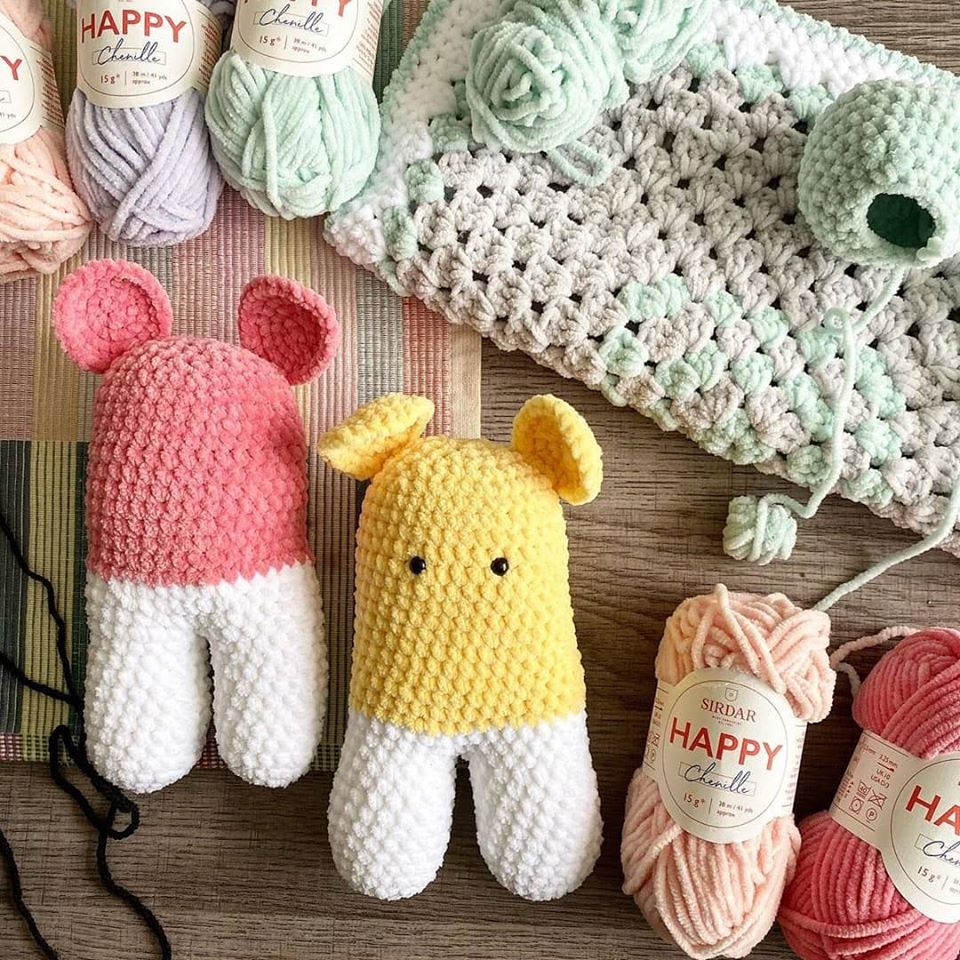
Sue has also experimented with the new super soft and super cute Sirdar Happy Chenille yarn, which comes in little 15g balls and is perfect for toy making. You can find all the beautiful colours in the range here. Look how lovely Hugo and Hermione look!
These little toys can be made in any yarn weight so are a great stash busting project. Try an Aran weight yarn if you want a larger version or 4ply for a smaller version. The pattern instructions will stay the same, you will just need to increase or decrease your hook size, as advised by the ball band on your yarn.
You can find the crochet pattern below. Happy crocheting everyone!
Abbreviations
Uk terms are used throughout the pattern
ch – chain
st – stitch
dc - double crochet
dc2tog – double crochet 2 sts together (decrease)
sl st – slip stitch
Pattern
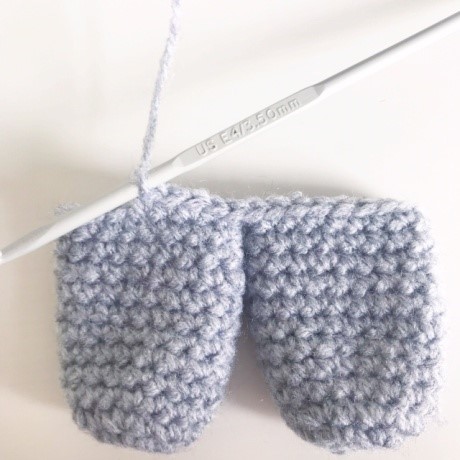
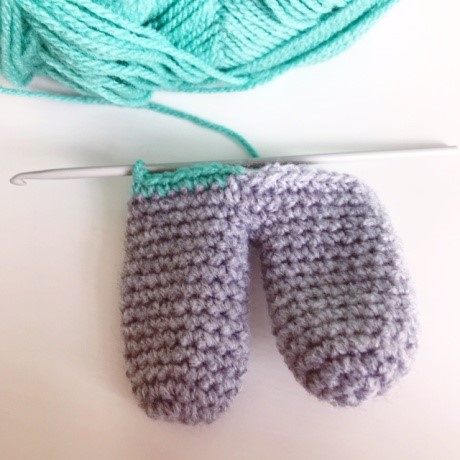
Legs
Starting with Yarn A
Rnd 1: make a magic circle (click here to learn how) and work 6 dc into the ring (6) (alternatively you can start with 2 chain and work 6 dc into the second chain from the hook)
Rnd 2: 2dc in next st [repeat 6 times] 12sts
Rnd 3: 1dc, 2dc in next st [repeat 6 times] 18sts
Rnds 4 - 12: 1dc in each st
Fasten off first leg, repeat as above for 2nd leg but don’t fasten off.
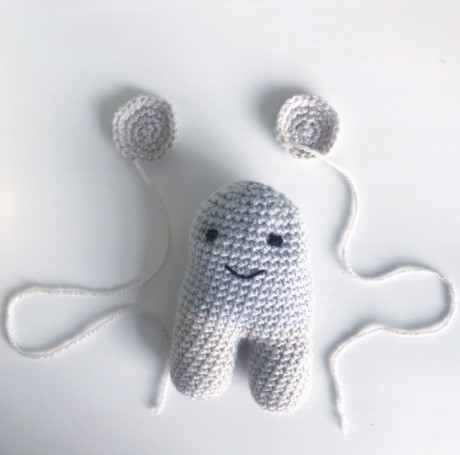
Main Body
Join legs together with a sl st.
Rnds 13 -15: dc into each st (36sts) fasten off.
Change to yarn B
Rnds 16 - 28: dc into each st
Rnd 29: 4 dc, dc2tog [repeat 6 times] 30sts (start to stuff the legs, and add more stuffing as you go along)
Rnd 30: 3 dc, dc2tog [repeat 6 times] 24sts
Rnd 31: 2 dc, dc2tog [repeat 6 times] 18sts
Rnd 32: 1dc, dc2tog [repeat 6 times] 12sts
Rnd 33: dc2tog [repeat 6 times] 6sts
(continue to add stuffing until the body is nice and firm)
Fasten off leaving a long tail.
Using the long tail thread your tapestry needle, weave inwards working from the centre to the outside; by inserting your needle under the first dc, front loop only don’t pull the yarn too tightly, continue to do this for each of the 6sts. Then pull tight, insert your needle down through the head and pull out anywhere at the side of your creature and snip off the tail. This will give you a lovely neat finish.
Ears
Starting with Yarn B
Rnd 1: make a magic circle and work 6 dc into the ring (6) (alternatively you can start with 2 chain and work 6 dc into the second chain from the hook)
Rnd 2: 2dc in next st [repeat 6 times] 12sts
Rnd 3: 1dc, 2dc in next stitch [repeat 6 times] 18sts
Rnd 4:2dc, 2dc in next stitch [repeat 6 times] 24sts, finish with a sl st fasten off leaving a tail long to attach to the body - Make 2.
Bow
Chain 7 sts
Row 1: dc into the 2nd st from your hook, repeat to end (6sts)
Rows 2 - 3: dc into each st fasten off, leaving a long tail.
Making Up
Sew ears in place as indicated on the picture, embroider two eyes, I use French knots (safety eyes can also be inserted prior to closing the toy) embroider mouth.
Bow, using your tapestry needle neaten starting tail. With remaining long tail, thread your tapestry needle and sew a few running sts at the bottom of the small rectangle, this should bring you to the centre. Then wrap the yarn around a few times, making your bow shape, Secure yarn at the back and stitch on to Hugo as a bow tie or a little hair bow for Hermione.
If you loved this little project, you can find more fun projects on our Dinosaurs and Dragons to Knit and Crochet blog post and our Mermaids and Unicorns to Knit and Crochet blog post.
Posted in: How To, How to crochet