You have no items in your shopping basket.
Swipe to the left
Bloom Burst Mystery CAL - final instalment
Print
By Teresa Conway
7 years ago
It's no longer a mystery where this CAL is going. We've finished cultivating our three floral motifs: meconopsis, hellebore and scabious. Now it's time to finish off with an abundance of leaves and plenty of sewing up!
For this CAL you will need Stylecraft Special DK (100% acrylic).
1 x 100g (295m) ball of Stylecraft Special DK (100% acrylic) in each Jaffa 1256, Fiesta 1257, Sunshine 1114, Matador 1010, Bright Green 1259 and Aspen 1422. You will also need a 4mm crochet hook.
Don't panic if you're new to crochet, as we teach you how to crochet this flower from start to finish in our very floral pictorial guide, below.
Don't worry if you've missed the previous instalments because you can still find them here:
This week's is mainly about darning ends and sewing up! But like us, we hope you find that your finished product is well worth the effort. The vibrant colour popping and unique structure is sure to make this Bloom Burst blanket an iconic piece for your home (or wardrobe!).
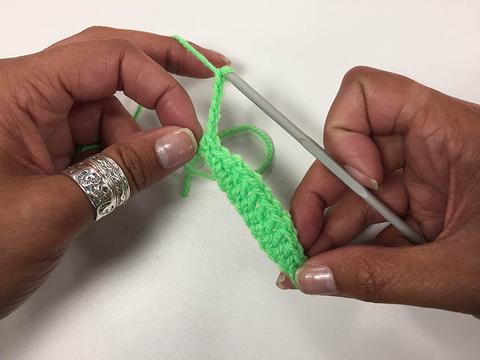
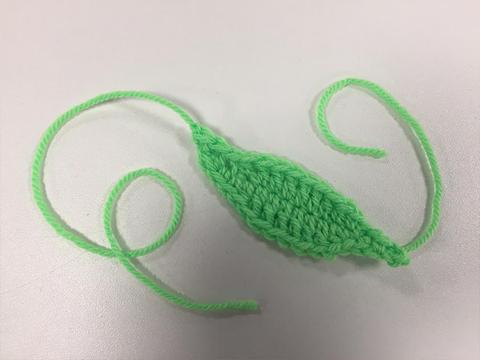
First we'll take you through the step-by-step guide on how to form your leaves with your bright green yarn.
Begin by making 14 chains (ch).
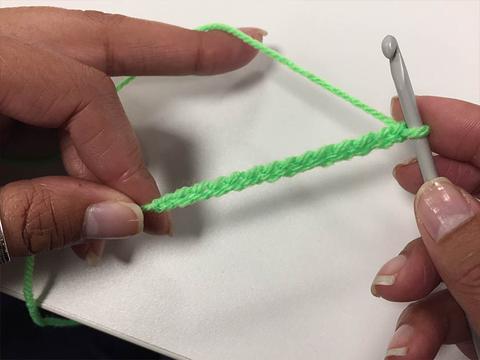
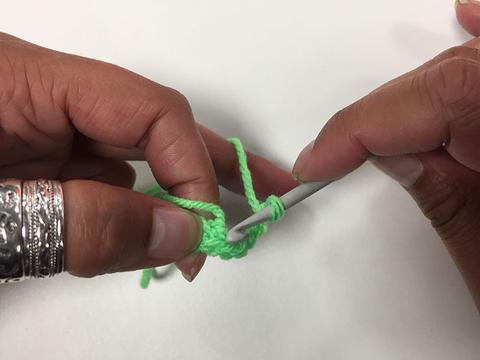
Insert your hook into the second chain from the hook.
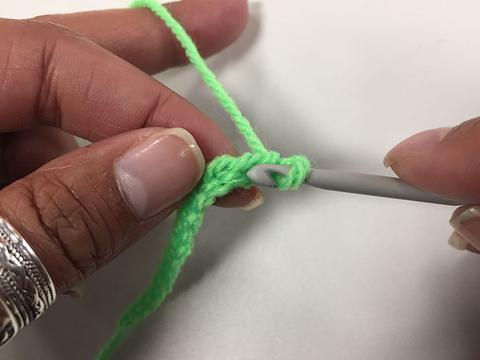
Work a double crochet (dc) here. This starts your first and only round.
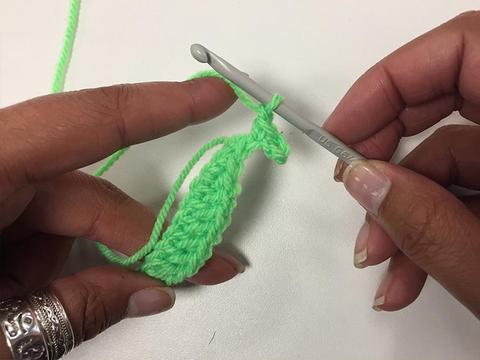
Continue working back along the chain using the stitches as stated in the pattern. They vary in height to create the curve of the leaf.
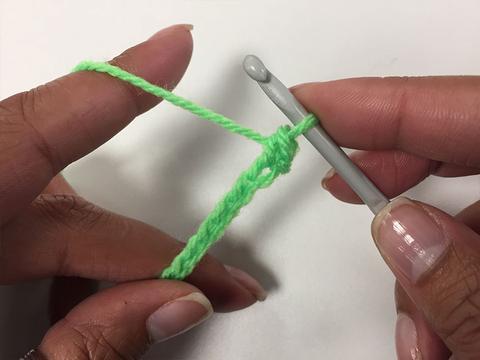
When you have worked in each ch you will need to work 5ch.
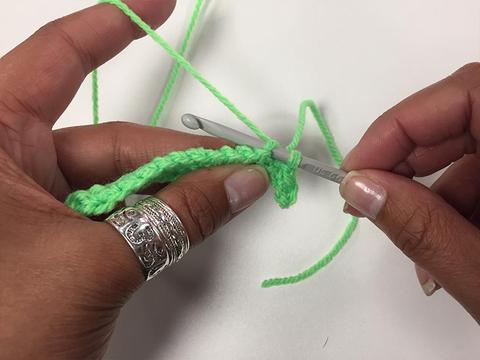
This allows you to turn and do the other side of your leaf at the same time creating a point.
Work a dc in the fourth ch from your hook.
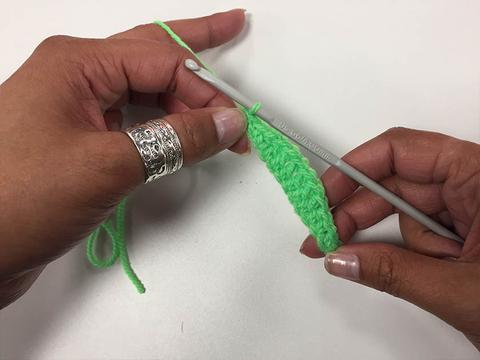
Work along the other side of your original chain length as stated in the pattern.
Carry on to the end and fasten off leaving a 20cm end.
Now for the making up!
We've provided you with some great tips on how to sew together your motifs, which can be found in your pattern, but the layout and structure we've left down to you. Due to the organic nature of this project there is no set way of positioning the motifs.
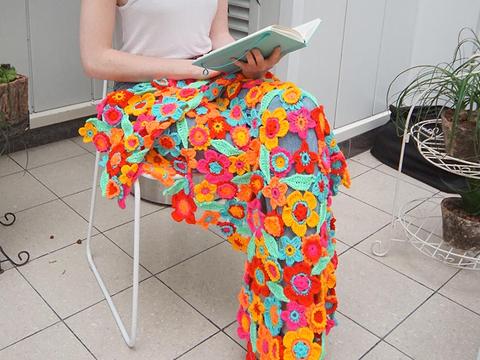
First and foremost is to decide what you want to use your finished item for. Our rectangular shape makes it ideal for a shawl or lap blanket, or an ornate spread for the foot of a bed.
Or maybe you have a table that is crying out for a pretty runner.
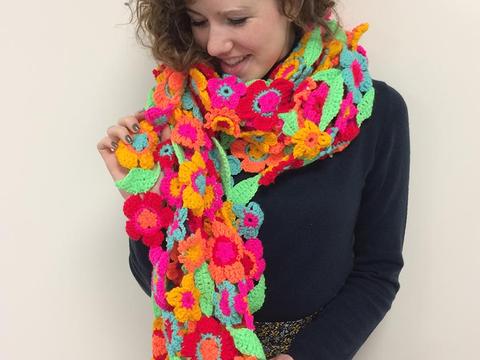
Now that the weather is turning we think this looks great as a statement scarf, as modelled below by Esme - doesn't she look great? If you think so you could try working a longer, thinner strip.
Once you have decided on what your shape will be, sew the motifs together using the 20cm ends that you left when fastening off your motifs. The stitch you will be using is a simple over sew.
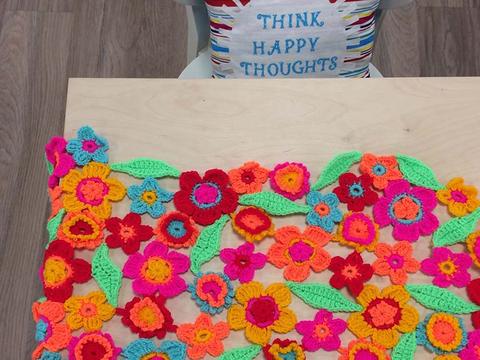
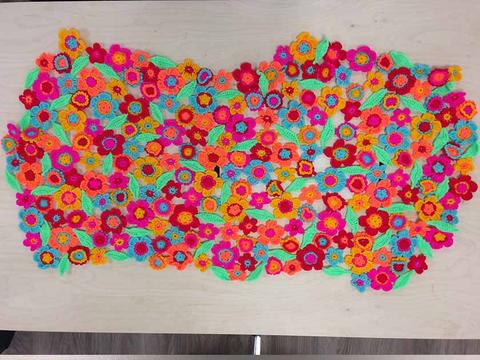
Here is a picture of our completed blanket which may be helpful as a guide. We recommend reading through the tips a couple of times to ensure that you are in the best place to get started.
Thanks for CAL-ing with us and we can't wait to see what unique pieces you come up with! Please share your photos on our Knitting Network Facebook Page.
Posted in: News