You have no items in your shopping basket.
Swipe to the left
Step by step crochet: Slipknot illustrations
Print
By Freddie Patmore
7 years ago
A slipknot is the very first loop you place on your crochet hook in order to create chain (ch) stitches. The knot can be adjusted to fit the size of your hook and should fit snugly (think hugging, not choking), freely moving around the hook when you slide it.
To make a slipknot
1. Loop the yarn with the ball end on top (the ball end is shown with a dotted line).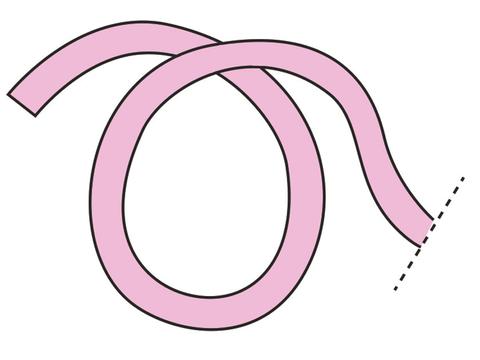
2. Dip the hook into the loop, catch the ball end and pull it through the loop. 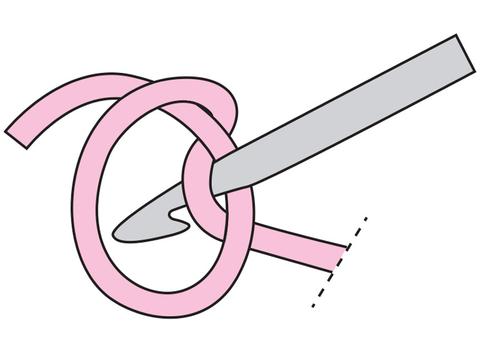
3. Pull both ends of the yarn to tighten the knot. 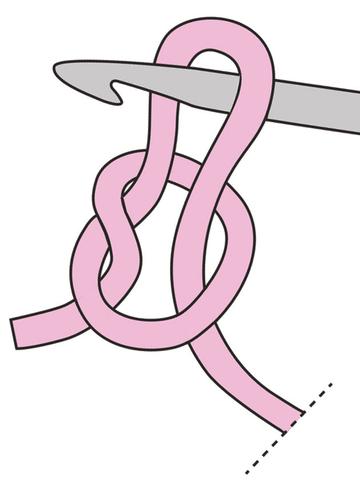
4. Pull the ball end to bring the knot up to the hook. 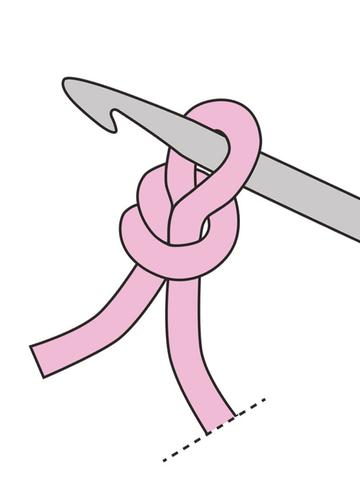
The benefit of using this type of knot is that it is adjustable, easy to undo if you need to start again and flexible just like the rest of the fabric.
In some instances when working in the round, as an alternative to using a chain ring, your pattern will ask you to make a slip knot (and possibly, one chain) and work in the round, into the slipknot itself. This technique is known as a slip ring.
The benefit of this is much the same as using a double loop of yarn or 'magic ring', in that the knot can easily be tightened when other stitches have been worked into the ring.
To make a slip ring
Work as given for stages 1 and 2, above. Do not tighten the knot. Instead leave the loop below your hook loose. 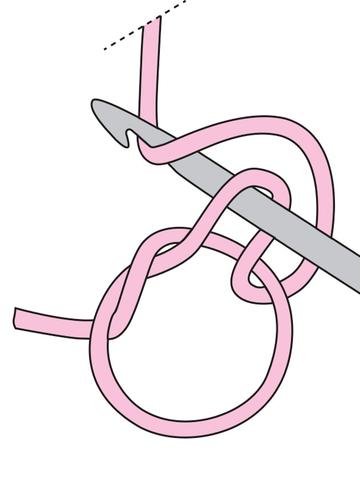 3. Work a single chain into the loop on your hook, allowing the loop below to remain loose.
 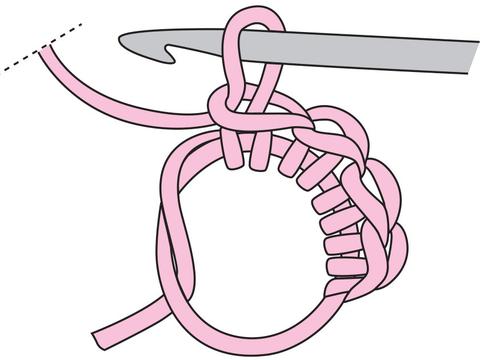 4. Working directly into the loop below and enclosing both the loop and short end of yarn, work the designated number of stitches into the ring.
3. Work a single chain into the loop on your hook, allowing the loop below to remain loose. 4. Working directly into the loop below and enclosing both the loop and short end of yarn, work the designated number of stitches into the ring.Tighten by pulling the short end of yarn, and continue working in the round as your instructions dictate.
Posted in: How to crochet