You have no items in your shopping basket.
Swipe to the left
Flower Garden CAL - fourth instalment
Print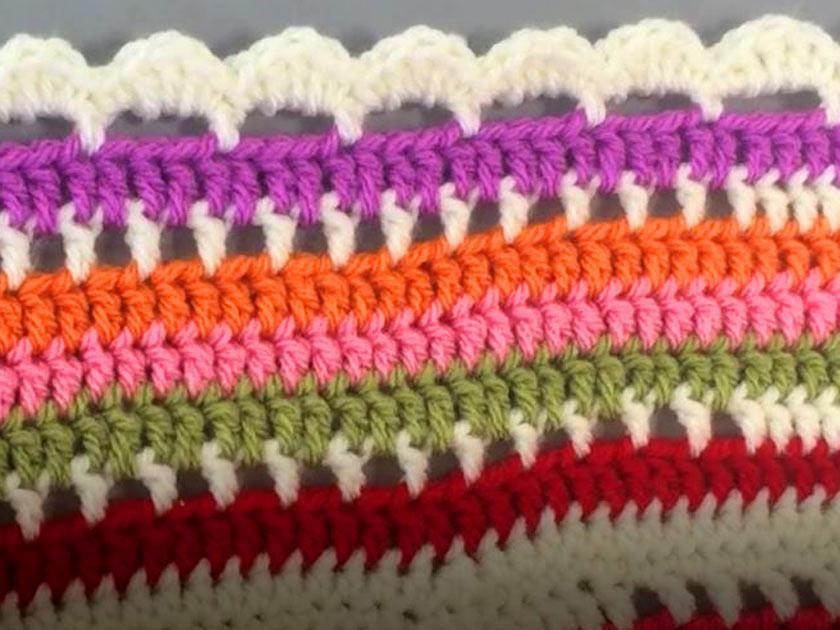
By Freddie Patmore
7 years ago
Doesn't time fly when you're having fun? This week we're bringing you the fourth and final instalment in the Flower Garden CAL but worry not, there's still plenty to keep you busy before you fasten off for the last time. And just in time for picnic season, too!
With all your squares finished and looking fabulous, we've got a gorgeous raised ridged joining technique before you tackle the finishing frame - a vibrant crocheted edging worked over several rounds.
For this CAL you will need Stylecraft Special Aran (100% acrylic).
For the complete blanket: 4 x 100g (196m) balls of Stylecraft Special Aran (100% acrylic) in Cream (1005); 1 ball in each of Pomegranate (1083), Lipstick (1246), Fondant (1241), Spice (1711) Magenta (1084), Plum (1061), Lemon (1020) and Meadow (1065). This CAL is crocheted on a 5mm hook.
Download the pattern for Part 4 here.
If you've missed the previous instalments, you can still catch up on Part 1, Part 2 and Part 3 on our blog.
We haven't been able to tear ourselves away from your progress photos on social media this week. And all of your WIP pictures have been whizzing in at lightning speed.
Many taken in cheery sunshine, which has made for some seriously vibrant snaps.
Eva artistically arranged her Part 3 batches on Instagram - just look at that colour pop!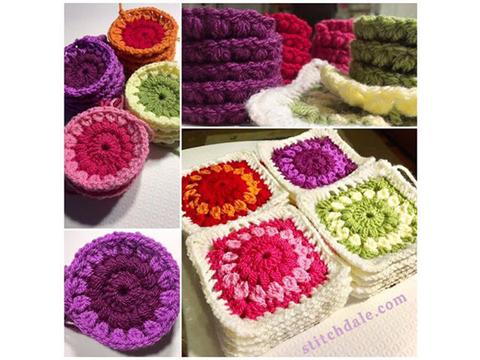
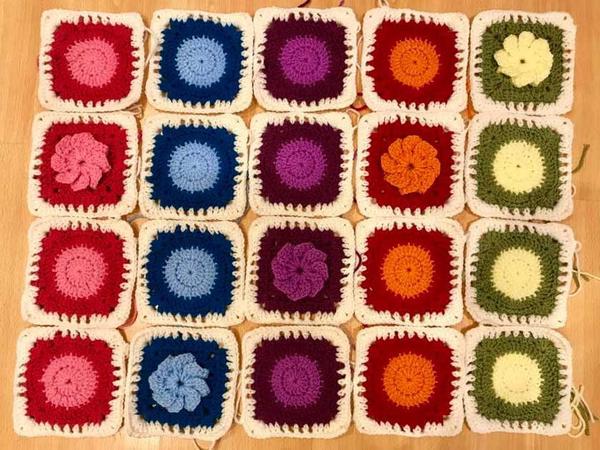
Joanne Sullivan has added blue to her colour mix for a rainbow of shades. Here she is all caught up to the end of Part 2.
And Jan Brodie's sunburst squares look sugary sweet in the natural light. She adopted the production line method to keep things interesting.
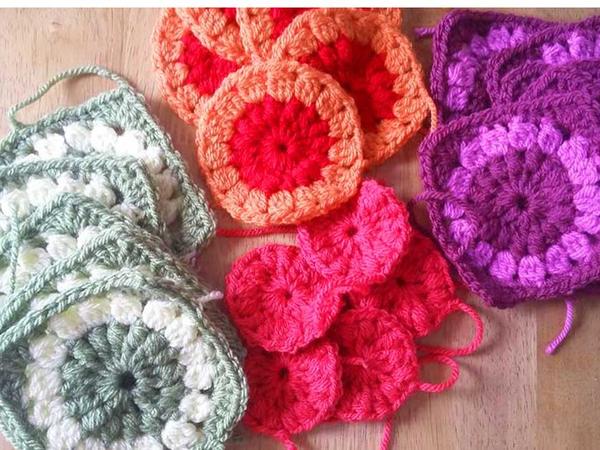
So now that you've completed all your squares, the first thing you'll be doing on our final instalment is joining all your squares together.
This week we've got not one, but two tutorial videos to help you achieve the perfect finish. And to show you how much we care about your enjoyment, due to unpopular demand we have opted to produce the videos without the jazz music in the background!
There are two ways you could join your squares, the first is a simple hand-sewn seam as over sewing will work just fine.
The second (and the one we'd thoroughly recommend) is a super speedy crochet join.
Arrange two squares so that they have wrong sides together.
Starting in a corner, join on cream with a slip stitch.
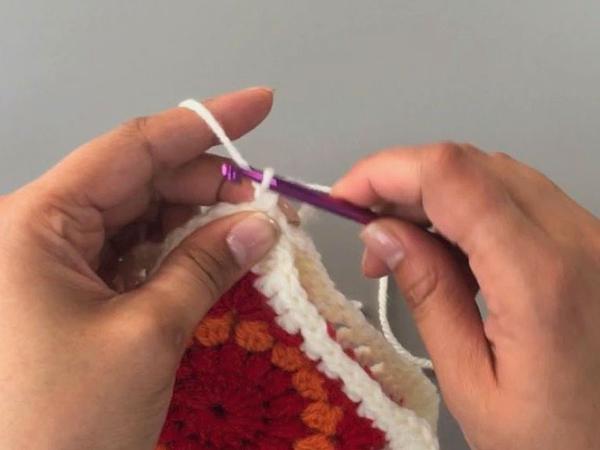
Working into the back loops of the edge stitches on each piece, work double crochet stitches (dc) all the way along the seam.
Fasten off after the final stitch (this will be the corner chain on this pattern) and darn in any ends before proceeding to your next seam.

The best way to use the crocheted join is to create strips of squares which you can then work long crocheted seams between to join together.
Resident expert Freddie Patmore talks you through it in our easy-to-follow video, below:
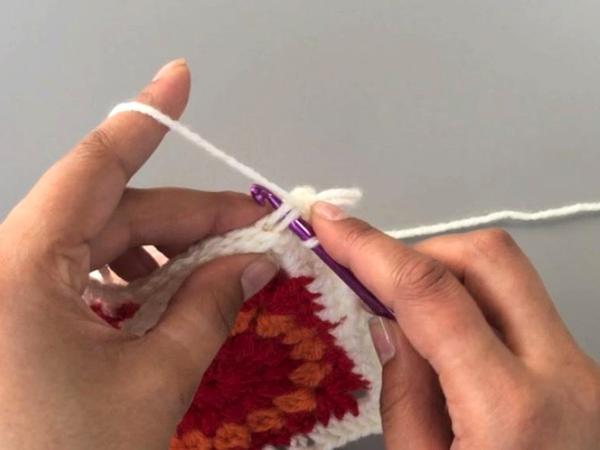
As for the edging, there are several rounds that you will need to follow the instructions closely from the pattern. The techniques used on the edging include trebles (tr), half trebles (htr), double crochet (dc), chain stitches (ch) and decreases.
When you're ready to tackle it, have your crochet ready as Freddie talks you through it round by round in our how-to video below:
Finally, we couldn't fasten off our CAL without saying a super huge thank you to everyone who took part. We hope you've had a wonderful time crocheting along with Lynne, Heather and all of us at The Knitting Network. We can't wait to see where your blankets find a forever home.
It's far from farewell from us, though! Stay tuned on our Facebook page for further exciting announcements on upcoming CALs.
Posted in: News